
Cut-Out Cookies: Baking Basics
‘Tis the season of sugar and flour, rolling and baking, decorating and eating. So many family traditions revolve around holiday baking and cookie decorating, yet it is an activity that still strikes fear into the hearts of many. I know I have seen my fair share of gingerbread men who lost an arm in transit to the cookie sheet or snowmen that spread into unidentifiable blobs. Here are a few tips to working with cut-out cookie dough that will help prevent these tragic baking mishaps.
SEE THE RECIPE
 by
Amber
 by
Amber

‘Tis the season of sugar and flour, rolling and baking, decorating and eating. So many family traditions revolve around holiday baking and cookie decorating, yet it is an activity that still strikes fear into the hearts of many. I know I have seen my fair share of gingerbread men who lost an arm in transit to the cookie sheet or snowmen that spread into unidentifiable blobs. Here are a few tips to working with cut-out cookie dough that will help prevent these tragic baking mishaps.
The Dough.

Not all cookie dough is created equal. Use one formulated for rolling and cutting. The dough tends to be a little stiffer, often using a great proportion of flour that helps the cookies hold their cut edges during the baking process. If you don’t already have a family favorite recipe, we definitely have a few you can try. Best Ever Vanilla Butter Cookies is a good place to start.
Chill It.

Don’t skip the chill step! This is super important for cut-out cookies. Not only is the dough easier to work with when it is chilled, chilling also helps the cookies keep their shape better (more on that in a minute). Instead of chilling the dough in the bowl, take the time to divide it in to two or three balls. Flatten each ball into a disk and wrap in plastic wrap before placing them in the refrigerator. Dividing and flattening the dough helps it chill faster and gives you a head start in the rolling process. Plus you only take out what you can work with at one time, keeping the rest of the dough chilled until you are ready to use it.
Roll With It.

Make sure you flour your rolling surface and your rolling pin. Use enough to keep the dough from sticking but you don’t want to work in too much extra flour in the process. Another method for rolling out dough is to place the chilled disk between two pieces of parchment paper. If you use the parchment paper method make sure the paper is flat to avoid getting wrinkles in your cookies (although cookie flaws can be covered with decorating!).
Cut It Out.

Firmly press your cookie cutters into the dough. Peel away extra dough and use a thin metal spatula to help transfer the shapes to the cookie sheet. If the cutters are pulling on the dough when you remove them try a little dip in flour before cutting.
Bake It.
If the dough gets too warm during the rolling, cutting and transferring process, place the cookie sheet in the refrigerator for a few minutes to chill the dough again. Placing chilled dough in a slightly hotter oven (usually 400 degrees versus 350 — 375 degrees used for cookies like chocolate chip) helps the cookies retain their shape.
Cool It.

Let the cookies rest on the cookie sheets for a few minutes before removing to a wire rack for cooling. This gives the cookies a chance to solidify a bit and minimizes the risk of damaging the shape while they are still soft from baking. Don’t leave them on the baking sheet too long because as they cool they will get difficult to remove (lining your pans with parchment paper can help avoid this problem).
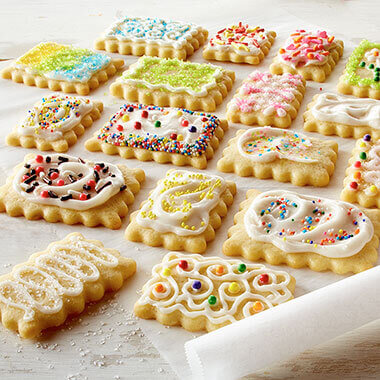
Now that you have made your cookies you can decorate them in any number of ways. Check out Decorating Cookies 101 for some pointers. And of course enjoy each and every bite!
Share Your Thoughts
Did you find this article helpful? Has it inspired you? What else would you like to know?


